


Cleaning, Updating & Organizing Panel Data


Sometimes participants move, change jobs, start families, or experience other life changes that can influence their eligibility for research. Once you’ve started building a panel, it’s important to keep participant data up-to-date over time.
Research Hub offers several features that make this process simple. In this lesson of Building a Participant Panel, you’ll learn:
- How to set up filters, segments, and labels to make your panel easy to navigate
- How to find and delete participant data
📹 Prefer watching to reading? This content is available as both an article and a video. Watch our Customer Success Specialist, Kaylynn, take you through the content in the video below or keep reading to dive in!
How to set up filters, segments, and labels to make your panel easy to navigate
Filters
Filters allow you to find participants that fit any criteria for which you have data stored in Research Hub, including participation history, contact information, or data from any custom fields.
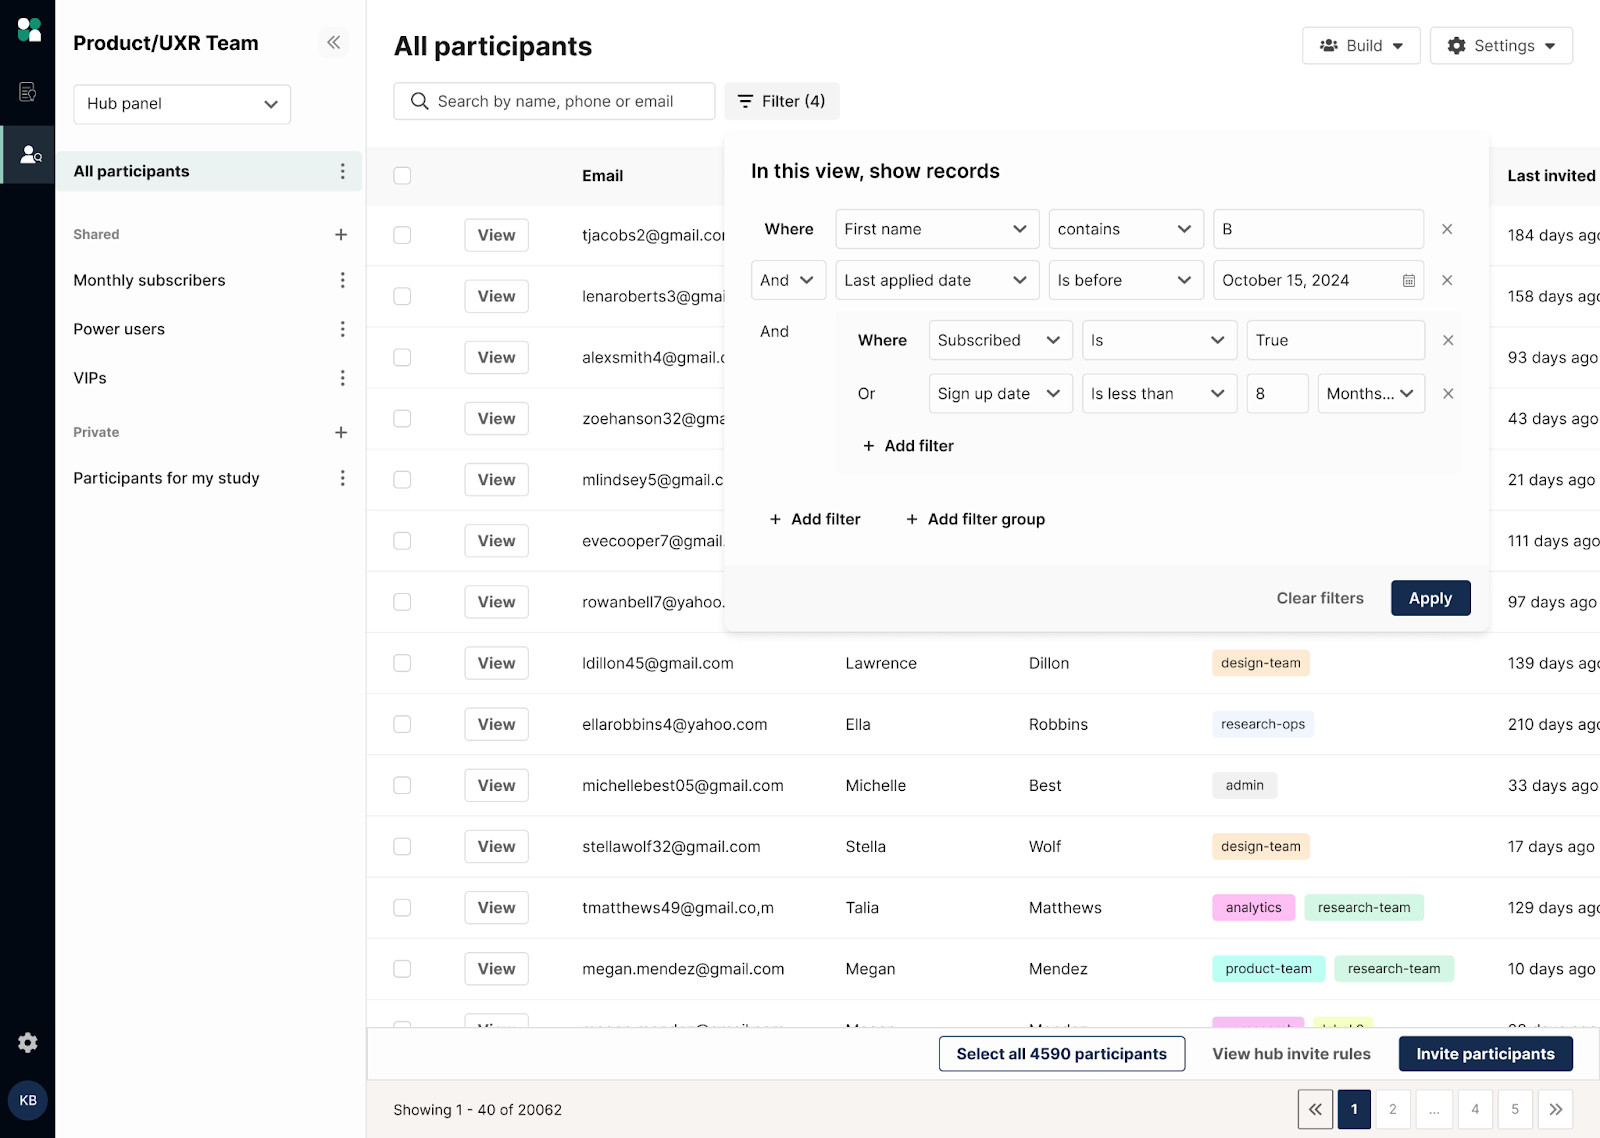
To filter for participants, navigate to your Hub panel and click “Filter” in the top right corner. You can choose any combination of filters to search for the right group of participants. For example, you can filter by:
- Default fields such as research activity such as project history, last applied date, last invited date, last participated date, incentives earned over a given period, date added to panel, or name or email fields if you're looking for a specific user.
- Custom fields for any customer data you have stored in a custom column within Research Hub.
💡 If you have a range of recruiting criteria, try applying multiple filters at once. You can also save your most useful filter settings as labels or segments (more on these below) to reapply in future.
Labels
Labels allow you to build flexible lists to group participants based on any criteria that’s important to you. Two common use cases for labels include:
- When you invite participants by uploading a CSV to a specific project, you can create and apply a label for the project title at the time of import. This allows you to filter and see exactly who was invited to a specific study, regardless of whether they participated.
- Sometimes (especially if your primary panel building tactic is opt-in forms), there are internal labels you may need to assign for organizational purposes—for example, things like churn risk, “do not recruit” customers, and other important contexts. In these cases, you may also want to tag participants with information that isn’t represented in a custom field.
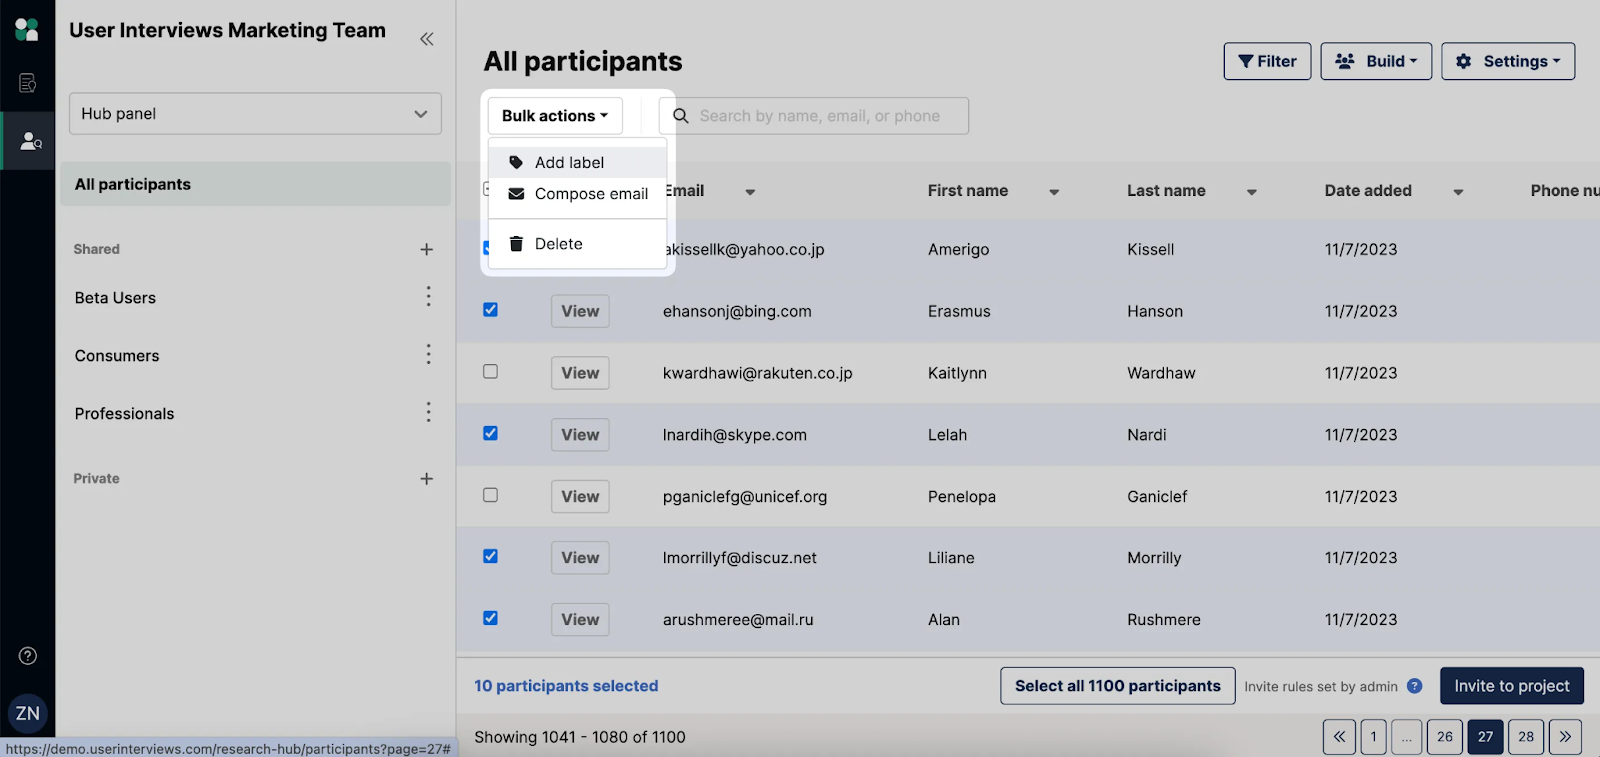
Once you’ve used filters to find and select the right group of participants, you can label them by clicking the "Edit labels" option from the Settings dropdown. Then, click the “Add label” option from the Bulk actions menu, and select the label you want to associate with those users. Once you've created labels, they will appear as a column in your Hub panel and you can filter by them.
💡Note: When Hub data is exported, labels are not included. So if there are any data points that would be crucial to get into a CSV export for further sorting / filtering, you should add that info as a custom field instead.
Segments
Dynamic segments are custom, pre-saved groups of participants that automatically add or remove participants based on your filter criteria and any changes in participant data. They allow your entire team to quickly pinpoint the right users for their research and retarget the same group for future studies.
There are two ways to create segments:
- You can create a segment directly from the left panel by clicking the “+” sign. Give your segment a name, then proceed to define the criteria for that segment.
- Alternatively, start by applying filters to your panel. Once you’ve filtered down to the group you want, click the “Save as new segment” button at the top of your filtered list, and give your segment a name.

You can also set permissions for your segment to define whether your teammates can view or edit your segment, or if you want to keep it completely private so as not to clutter the workspace.
Segments can be used in a variety of ways, but some popular use cases include:
- Segments for customer personas or key characteristics—such as grouping by new users, monthly users, and power users of a product, or dog owners and cat owners
- Segments for specific teams in your organization—someone on a Research Operations team managing a large Hub panel may want to guide recruitment by creating segments customized for specific researchers or research teams.
- Segments for quick access to “standard” audiences—a researcher may often want to start with default “active users” of a product, and refine their segment from there.
How to find and delete participant data
Periodically, you may need to find and remove users from your Hub database. Instances where you might want to remove users include:
- Disengagement: To keep your database clean, you may want to remove inactive users who haven’t participated in studies, responded to your invites, or opened any emails over a certain period of time.
- Duplicates: Participants with multiple email identifiers may end up with duplicate records in the system, so you’ll want to delete duplicate records in the database.
- By request: Occasionally, you may receive requests from participants to delete their data, and/or provide details about what data you have collected on them.
Two good ways to find outdated participant records are:
- Use a combined filter to find participants whose last invited date is less than 365 days ago, and last applied date is more than 180 days ago (i.e., they were invited in the last year but haven't applied in the last 6 months). These are unengaged users, and it’s worth using bulk emails to contact them about whether or not they’d like to be removed from your list.
- Filter by participant names and look for instances of the same name to identify duplicate records. Once you’ve identified duplicates, contact each participant and ask them which of their records is preferred.
Once you’ve identified participant data you need to update or delete, you can edit participant data individually by clicking the “edit” icon in the top right corner of their profile, or in bulk by re-uploading the correct data in a CSV. You can also send these participants an opt-in form to update their participant records with their most recent responses.


Managing Access with Hub Panels